You don’t look up “repairing damaged roof” because you’re curious. You’re trying to stop a leak and limit interior damage.
In coastal North Carolina, that decision gets tricky fast. It’s only going to get worse if it’s ignored, because the stain you see inside often isn’t where water got in, and the cheapest “patch” can turn into a repeat bill after the next wind-driven storm. This guide covers safe first-hour triage, how to pinpoint the real failure point (usually flashing or penetrations, not the middle of the shingle field), and how to choose between a spot repair, a roof restoration/rejuvenation to buy credible time, or a full replacement when the roof system is at end-of-life or the scope starts edging toward bigger code requirements.
Triage First: Stop The Leak Safely

You can turn a manageable leak into a medical bill or a bigger structural problem in one rushed trip onto a wet roof. The smartest “first move” is the one that keeps you safe and keeps water from spreading.
In the first hour, focus on temporary containment and staying safe, not “repairing a damaged roof.” In coastal North Carolina, most interior damage comes from water that keeps running after the first stain shows up, especially during wind-driven rain, when an emergency roof repair can prevent spread.
Start inside: put a bucket under the drip and move valuables. Then document what you see for insurance: photos of the ceiling/walls and any obvious exterior damage from the ground.
Avoid roof work in the dark or on wet shingles. If you can’t reach a safe, low slope area in dry daylight, don’t go up. And skip “miracle fixes” like smearing roofing cement and sprinkling loose granules, since manufacturers don’t treat that as a real repair and it can complicate proper work later.
Find the Real Failure Point
A homeowner spots a brown ring on the ceiling, replaces the shingles right above it, and the next storm brings the stain back twice as wide. The miss is almost always the same: fixing where the water showed up instead of where it entered.
A ceiling stain tells you where water ended up, not where it got in, good roof leak detection starts at the entry point, not the stain. In wind-driven Wilmington rain, water can enter high on the roof, ride under shingle edges, and snake along a nail line or underlayment seam before it finally shows up 6 to 12 feet away inside. If you pay to “fix the spot over the stain,” you can end up funding a neat-looking patch while the real entry point keeps feeding moisture into your decking.
To illustrate this, a drip near an exterior wall often traces back to a flashing problem at a step flashing run or a roof-to-wall tie-in, not a random shingle in the middle of the field. Transitions and penetrations fail first because they depend on tight overlaps and seal integrity, and salt air plus heat cycling accelerates that wear.
When you (or a roofer) inspect, push for a cause, not a guess. A quick fix vs. the right fix matters here.
Chimneys, vent boots, and other roof penetrations are among the most common leak entry points in wind-driven coastal storms. Read more in our article: Roof Leaks Chimneys Vents Start at the highest point above the interior leak and work uphill and outward, paying special attention to these common failure zones:
-
Flashing transitions: chimney flashing, step flashing along sidewalls, valleys, and any place two roof planes meet, this is where roof flashing repair is often needed. Look for lifted edges, rust, gaps, or old mastic smears that have cracked.
-
Penetrations: plumbing vent boots, attic fans, skylights. Cracked rubber boots, loose collars, or exposed fasteners often leak only during wind-driven rain.
-
Shingle field damage: missing tabs, creases from wind lift, exposed fiberglass, or widespread granule loss that makes shingles brittle.
-
Moisture/decking clues: in the attic, look for darkened plywood, damp insulation, moldy smell, or rusty nail tips. If the wood feels soft, you’re beyond “repairing damaged roof” shingles, you’re dealing with trapped moisture that can spread.
A practical move: when you get an estimate, ask the contractor to point to the entry path (photos help) and name the component that failed first: shingle or flashing. If they can’t explain that in plain language, you’re likely buying a patch, not a fix, like wandering the Home Depot or Lowe’s roofing aisle and grabbing whatever promises “stops leaks.”
The Three Paths for Repairing Damaged Roof
You want to spend money once and feel done, not gamble on the cheapest option and hope the next squall is gentle. The right choice depends less on the leak and more on what the rest of the roof system is telling you.
| Path | Best when | Primary goal | What it typically includes | Key watch-outs |
|---|---|---|---|---|
| Spot repair | Damage is isolated; surrounding shingles/underlayment still have life | Stop the specific leak fast; lowest short-term cost | Replace damaged shingles and fix the actual failed component (often flashing or a boot) | Fixing the symptom (e.g. sealing) can lead to repeat leaks if the true entry point isn’t addressed |
| Restoration / rejuvenation | Roof is aging but not failing broadly; you want credible time before tear-off | Extend service life and smooth costs | Treatment to improve flexibility/slow brittleness plus targeted repairs for active leaks | Only works for a good candidate roof; does not replace needed repairs for active leak components |
| Full replacement | Problems aren’t isolated; materials near end-of-life; scope is trending toward replacement-level work | Reset the system for long-term reliability and cleaner warranty coverage | Tear-off and rebuild to current system standards; address widespread issues | May be triggered sooner if work disturbs a large share of roof area (e.g. ~25% within 12 months) |
Most “repairing a damaged roof” decisions boil down to three outcomes: immediate dry-in at the lowest cost, a few extra years from an aging system, or a full reset with replacement. If you treat this like a simple technical question, you can end up throwing good money after bad, once for a patch and again when the rest of the same-aged roof starts failing.
Path 1: Spot Repair (Fix The Specific Failure). This is the right play when damage is isolated and the surrounding shingles and underlayment still have life. You’re optimizing for immediate dryness and lowest short-term cost. A clean spot repair replaces damaged shingles and addresses the actual leak component (often flashing or a boot), rather than covering symptoms with sealant.
Path 2: Restoration/Rejuvenation (Extend Service Life). This sits between patching and replacement when your roof is aging but not falling apart, like giving sun-baked shingles a drink of water, not a new skeleton. You’re optimizing for life extension and cost smoothing, especially if you want to avoid a $9k-plus tear-off right now. The idea is to improve shingle flexibility and slow brittleness so you get a few more storm seasons, but it only works if the roof is a good candidate, meaning you still need targeted repairs for active leaks.
Restoration and rejuvenation can make sense when shingles are aging but still structurally sound, especially if you’re trying to avoid an immediate tear-off. Read more in our article: Roof Restoration Vs Replacement
Path 3: Full Replacement (Reset The System). This is what you choose when problems aren’t isolated, materials are near end-of-life, or the scope starts to look like replacement-level work anyway. You’re optimizing for long-term reliability, cleaner warranty coverage, and fewer recurring callbacks. In North Carolina, there’s also a practical threshold often cited around work affecting more than 25% of the roof area within 12 months, which can push you into broader code-compliance territory even if you hoped to “just patch.”
The 25% Rule That Changes Scope
In North Carolina, a commonly cited reroofing threshold is work affecting more than about 25% of your total roof area within a 12-month period. Cross that line and what felt like “a few small repairs” can start getting treated like replacement-level work, meaning permits and broader code compliance may come into play instead of a simple patch.
This is where piecemeal fixes can snowball: you repair wind-lifted shingles on one slope and then you chase another leak after the next storm. HOA/ARC rules can make that shift even more of a headache. Before you approve multiple sections of work, ask your roofer to estimate the roof-area percentage they’ll disturb this year and whether that scope triggers additional requirements where you live.
Cost Reality Check, and What Drives It

Most U.S. roof repairs cluster around $350–$1,900, with an average near $1,150. If your “small repair” quote is way outside that band, the scope is probably bigger than the word “repair” suggests.
Across the U.S. typical roof repair pricing runs $350–$1,900, averaging about $1,150. Use that as a gut-check: if you’re being quoted far above that for a “small repair,” you need a clear explanation of what’s actually being opened up and rebuilt. Anything else is contractor hand-waving.
Prices swing because the work isn’t priced by stain size. Don’t let Angi or Nextdoor price anchors fool you. A simple shingle swap on a walkable, single-story slope costs less than a leak at a chimney or vent boot where flashing and resealing drive labor. Steep pitch, tricky access, and coastal wind exposure also slow everything down. The big wildcard is hidden moisture: once a crew finds soft decking or wet insulation, “repairing a damaged roof” becomes carpentry and drying, not shingles.
When Repair Becomes a Repeat Tax
A repair turns into a repeat tax when you’re not fixing a one-off failure, you’re kicking the can down the road on a system that’s failing in the places that fail first: transitions. For instance, if the leak shows up around a chimney corner or step flashing along a sidewall, the next storm often finds the next weak seam nearby, even after a “successful” patch.
Treat these as recurrence signals, not bad luck: multiple leaks in different rooms, more than one previous patch in the same transition zone, widespread granule loss or cracking on the surrounding shingles, or any sign in the attic that moisture has been present for a while (darkened decking, damp insulation, rusty nail tips). If you keep paying to chase symptoms, you can spend replacement money in installments and still live with the risk, like bailing a jon boat with a coffee cup.
Another practical step: keep a simple repair log and have your roofer mark each fix on a roof diagram by component (flashing, boot, valley, field shingle). If the map keeps clustering around transitions, you’re not “done” after this repair, you’re on a cycle.
A Coastal NC Filter: Wind, Salt, Algae
Two neighbors can take the same storm and end up with very different roof outcomes because one detail was already compromised before the wind showed up. Coastal exposure punishes the weak points first, and it rarely starts in the middle of a shingle field.
In Wilmington-area conditions, the “damage” you see often isn’t the thing that’s failing first, salt air roof damage can accelerate what’s already weak. Wind-driven rain exploits tiny openings at edges and transitions (rakes, ridges, valleys, sidewalls, vent boots), salt air accelerates metal corrosion (flashing, drip edge, fasteners), and heat cycling breaks seals faster than you’d expect.
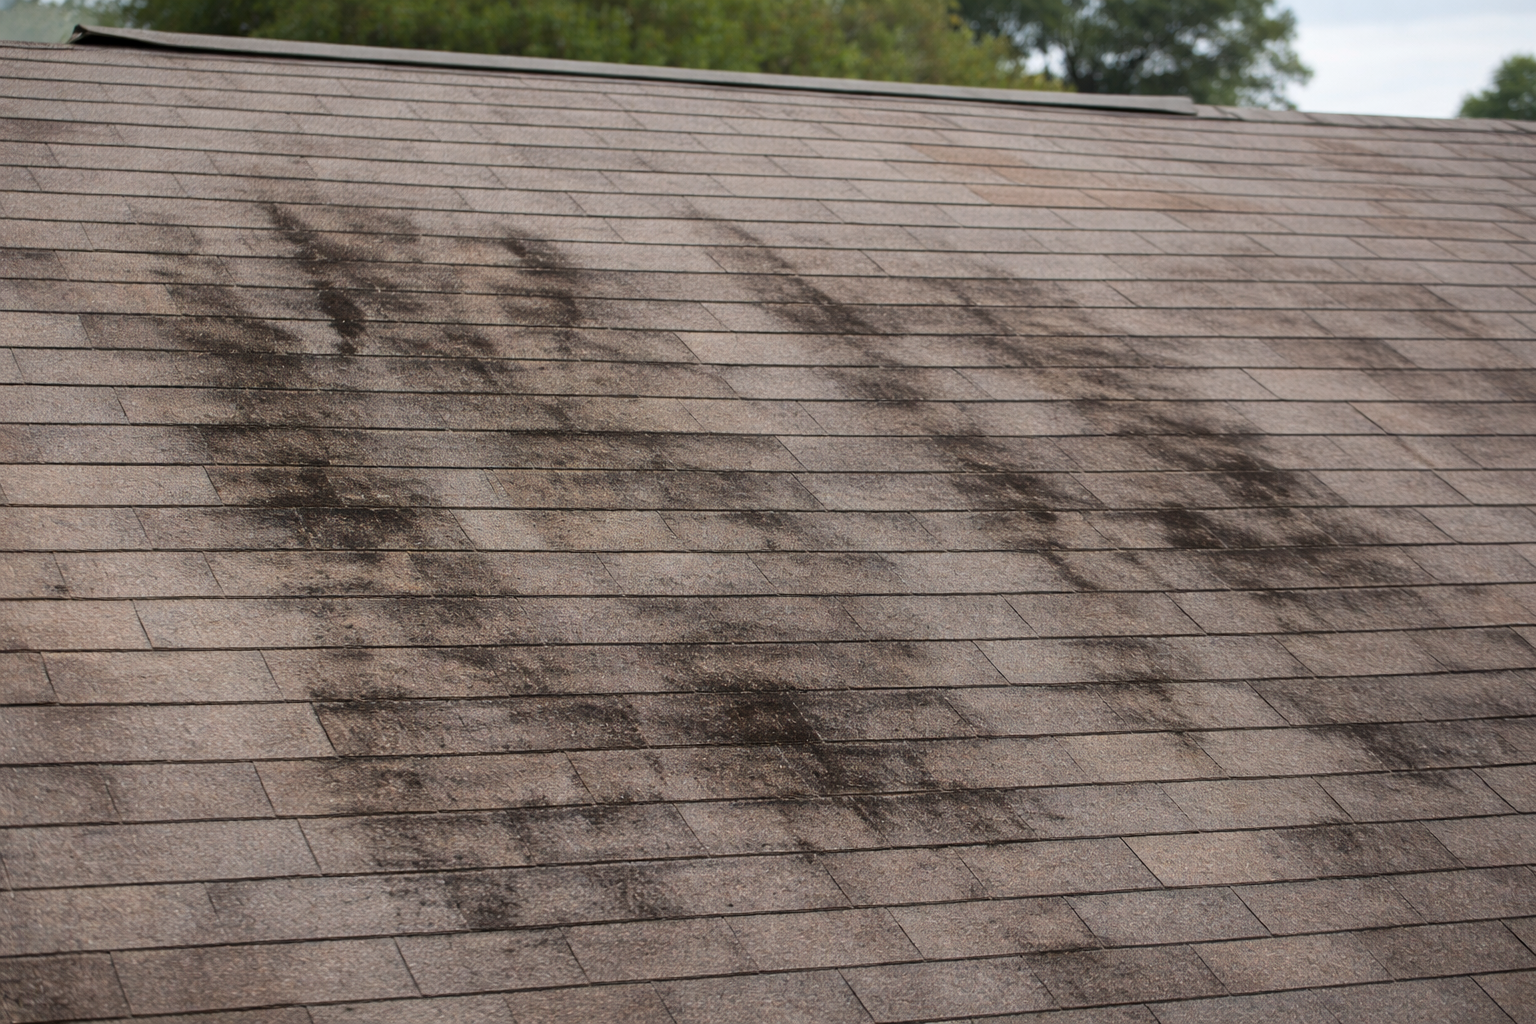
And those black streaks and green patches aren’t just cosmetic: algae and moss hold moisture and can speed shingle aging. When you’re choosing between spot repair, rejuvenation, or replacement, ask for photos of flashing condition, fastener rust, and seal integrity in the zones that take the brunt of coastal wind. Treat it like a FEMA named-storm checklist, not a casual glance at the shingle field.
In coastal areas, salt air and wind exposure can speed up shingle wear and rusting at metal components like flashing and fasteners. Read more in our article: Signs Salt Air Wind Damage Shingles
FAQ
How Fast Can You Repair A Damaged Roof After A Storm?
For an active leak, you should aim for same-day or next-day temporary dry-in, then schedule the permanent repair once the roof is dry enough to work safely. In coastal NC, crews may prioritize tarping and flashing stabilization first because wind-driven rain can turn a small opening into widespread decking and insulation damage.
Is Caulk Or Roofing Cement A “Real” Roof Repair?
It’s usually a temporary stopgap, not a durable repair, especially on shingles where water moves under overlaps. If a contractor proposes smearing mastic and “re-granulating” with loose granules, know that manufacturers like GAF don’t treat that as a true repair and it can create warranty and follow-up problems.
What Should You Ask A Roofer Before You Sign?
Ask them to show you the actual entry point (not just the interior stain line) and name the failed component: shingle, flashing, penetration boot, or decking. Then ask what they’ll remove and rebuild, and what specific condition would change the scope once they open it up.
Will A Repair Come With A Warranty?
Many roofers will warranty their workmanship on the repaired area, but they won’t warranty the surrounding, same-aged roof system, and that’s reasonable. Get the warranty in writing and confirm whether it covers leak recurrence at the repair location versus unrelated leaks elsewhere.
When Does A “Repair” Start Acting Like A Replacement?
If the work will disturb more than about 25% of the total roof area within a 12-month period, it can trigger replacement-level requirements under North Carolina’s adopted reroofing rules. Before you approve multiple repair phases, ask your roofer to estimate the percentage of roof area they’ll affect this year so you don’t get surprised mid-project.
Roof not getting any younger? Contact us or call 703-673-6301 to find out where you stand.Skip the ladder. HardShore’s free Wilmington roof inspection does the checking and you keep the report.