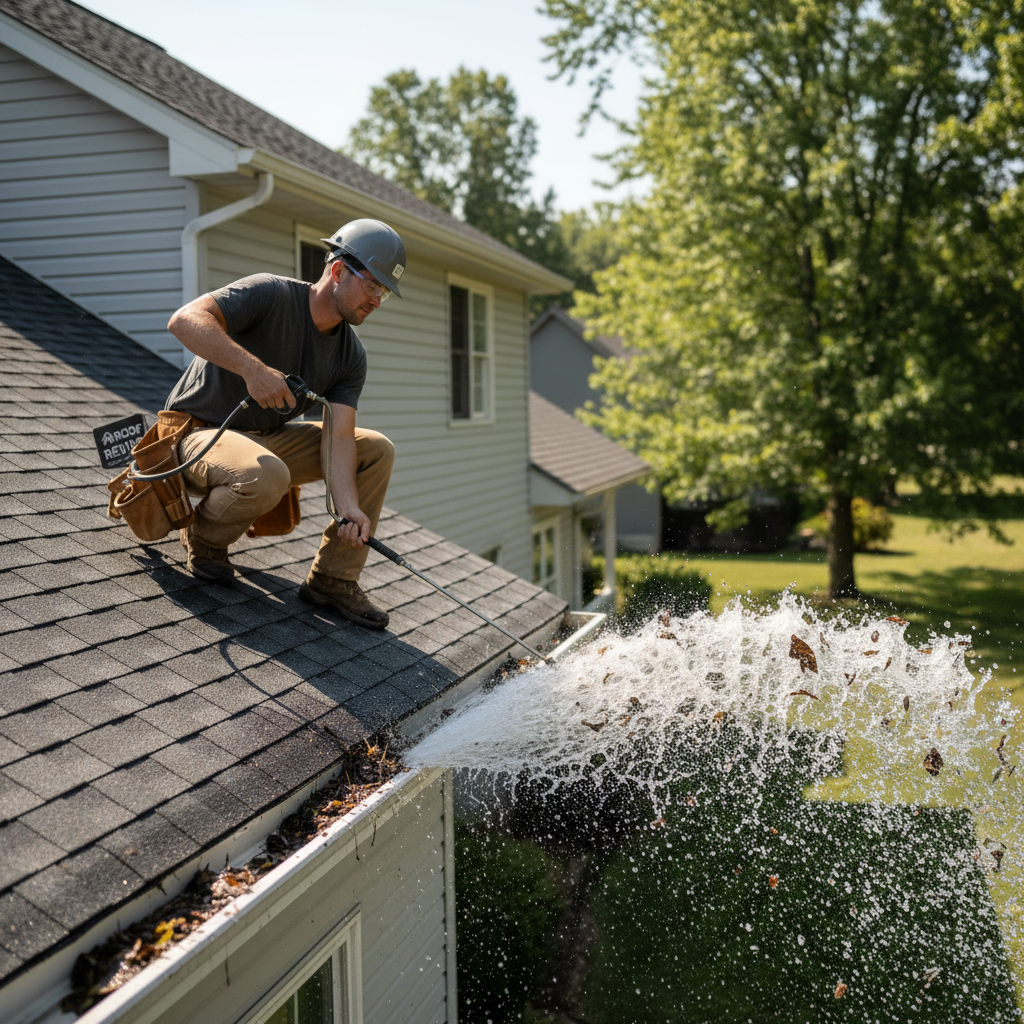
You can kill moss on your roof safely by using a low-pressure chemical treatment. You should skip pressure washing and aggressive scraping to protect shingles. If access is risky, hire a soft-wash pro.
If you’re in a humid, tree-heavy area like Wilmington, you’ve probably watched the shady side of your roof turn green and wondered what works without stripping granules or creating a leak. The trick is separating “kill” from “gone”: you’re trying to stop the moss first, then give rain and time a chance to weather it off. The sections below walk you through how to judge how bad the growth is from the ground, choose the safest method for your roof and runoff situation, and stop it from coming right back.
Kill Moss on Roof Safely

If your goal is to kill moss on an asphalt shingle roof without shortening the roof’s life, do it right the first time with a roof moss treatment. Use a low-pressure chemical treatment (a pump sprayer or a pro soft-wash), like pulling weeds by the roots instead of ripping up the whole flower bed. In rainy, tree-heavy areas around Wilmington, the urge to “blast it clean” is exactly what causes avoidable damage.
Rethink the idea that the best method is the one that looks cleanest today. Pressure washing and hard brushing can strip granules and push water up under shingles, turning a moss problem into a leak or premature shingle failure.
What to do differently right now
-
Choose low-pressure application that lets the product do the work; expect moss to die first, then weather off over time.
-
Avoid pressure washers and aggressive scraping, especially on older shingles.
-
Treat prevention separately: zinc strips can help inhibit new growth, but they’re not your primary “kill” tool for existing moss.
Soft-wash roof cleaning removes moss by relying on chemistry and dwell time rather than abrasion that can strip granules. Read more in our article: Roof Cleaning
How to Remove Moss From Roof: Start by Judging Severity
You spot a green patch and assume it needs a quick scrub, but that split-second diagnosis is how shingles lose granules or someone ends up on an unstable ladder. A better call starts with judging what you’re dealing with from the ground.
You can judge severity from the ground. What matters is whether the growth is thin and surface-level (mostly a cosmetic moisture signal) or thick enough to hold water, pry at shingle edges, and slow drainage. If you treat a light patch like a “scrub it off now” emergency, you’re more likely to damage shingles than solve the problem.
Scan the roof from the ground with binoculars and sort what you see into three tiers. Skip the ladder heroics from weekend project aisle gear if you can’t stay stable at the eave. As an example, the north-facing plane behind a line of pines in Wilmington often looks “a little green” at first, then turns into a spongey ridge-line band that never really dries.
| Severity | What you’ll see from the ground | What it implies |
|---|---|---|
| Light | Small green freckles or a thin film in shaded zones; shingle tabs still lie flat; gutters and valleys look clear. | Mostly cosmetic moisture signal; risk is spread if the area stays damp. |
| Moderate | Fuzzy mats or scattered clumps with visible texture; often near the ridge, under tree drip lines, or along nail-line humps; water seems to linger after rain. | Higher risk of faster granule wear and a roof that stays wet longer. |
| Heavy | Thick pads/“pillows” or seams that look bridged; shingle edges appear lifted or distorted; valleys look partially blocked. | Moss is changing how water moves; prioritize non-force methods and stricter safety/access. |
-
Light: small green freckles or a thin film in shaded zones; shingle tabs still lie flat; gutters and valleys look clear. Your risk is mostly that it spreads if the area stays damp.
-
Moderate: fuzzy mats or scattered clumps you can see texture on; growth concentrates near the ridge, under tree drip lines, or along nail-line humps; water seems to linger after rain. Your risk shifts to faster granule wear and a roof that stays wet longer.
-
Heavy: thick pads, “pillows,” or seams that look bridged; shingle edges appear lifted or distorted; valleys look partially blocked. At this point, the moss isn’t just living on the roof, it’s changing how water moves.
If you land in moderate or heavy, your next move should be to prioritize methods that don’t rely on force and to be stricter about fall risk and access, because the roof surface is already less predictable underfoot.
Choose Your Method: Soft-Wash vs DIY Powders vs Pro
A homeowner gets impatient, blasts the roof clean in an hour, and celebrates until the next rain reveals lifted edges and a new leak. Another chooses a slower, chemistry-first approach and keeps the shingles intact.
Curb appeal matters for roof cleaning and shingle health. But pick your approach like you’re buying years of roof life, not just a faster “clean”: shingle preservation, runoff and landscape safety, and durability.
| Approach | Shingle preservation | Runoff & landscape safety | Durability / regrowth control | Best fit |
|---|---|---|---|---|
| Soft-wash (DIY pump sprayer or pro) | High (chemistry + time, not abrasion) | Medium–High (depends on overspray/runoff plan) | Medium–High (kill step; can pair with prevention) | Homeowners prioritizing roof life and controlled cleaning |
| DIY powders / ridge-line metals (prevention layers) | High (non-abrasive) | Medium (still ends up in gutters/runoff) | Medium (helps inhibit new growth; not an instant fix) | Preventing regrowth after a kill treatment |
| Hire a soft-wash pro | High (chemistry-based, low pressure) | High (more controlled application around plants/drainage) | High (kill + prevention plan; fewer repeat cleanings) | Risky access, steep/high roofs, or heavy growth |
| Pressure washing / aggressive scraping (avoid) | Low (can strip granules/lift edges) | Low–Medium (overspray/runoff still occurs) | Low–Medium (looks clean fast but can shorten roof life) | Not recommended for asphalt shingles |
In Wilmington’s wet, tree-shaded spots, the method that makes the roof look better in an afternoon can also be the one that shortens the roof’s life.
Start with shingle preservation. Anything that depends on force, even “just a little scrubbing,” risks granule loss and lifted edges on asphalt shingles. Soft-wash style treatment, whether you apply it yourself with a pump sprayer or you hire it out, wins here because it relies on chemistry and time, not abrasion.
Then pressure-test runoff safety. Whatever you put on the roof comes off the roof. If you’re near shrubs, a rain barrel, a drainage ditch, or a storm drain, you need a plan for overspray and runoff, not just a product. Before mixing, check the label concentration, since a casual “50/50” blend can end up far stronger than expected.
Finally, judge durability. DIY powders and ridge-line metals can help keep new growth from taking hold, but they’re prevention layers, not an instant fix. For instance, zinc strips are commonly described as inhibiting moss and mildew rather than killing existing mats, and they typically need about an inch or more exposed to work well. If you want fewer repeat cleanings, you should favor a plan that pairs a kill step with prevention, instead of expecting one product to do both.
If your roof is already near the end of its service life, even gentle cleaning decisions should be weighed against the risk of accelerating shingle failure or revealing underlying issues. Read more in our article: Wilmington Roof Too Old
DIY Soft-Wash, Step by Step

Typical soft-wash guidance puts sodium hypochlorite on roofs in roughly the 1%–6% range, not at full-strength or guesswork levels. Getting your mix and application under control is what keeps “DIY” from turning into “damage.”
If you DIY a soft-wash, your win condition isn’t “looks brand-new today.” It’s “kills the moss without tearing up shingles or wrecking what’s below the eaves.” Here’s my strong take: copying Nextdoor “roof wash” advice is a bad bet. The fastest-looking DIY results usually come from too-strong mix or too much force, and both can cost you shingles and landscaping.
Start by setting up for low pressure and controlled runoff. You want a pump sprayer that can reach the lower roof plane without atomizing mist everywhere, plus a hose ready to pre-wet and rinse plants. Before mixing, read the bleach label so your dilution math matches what you bought.
Use this sequence to keep it effective and predictable
1) Pre-wet and cover what matters. Thoroughly soak shrubs and grass near downspouts, and move anything you care about (patio cushions or kids’ toys) out of splash zones.
2) Mix based on the label percentage, not a rule of thumb. Avoid casual “50/50 bleach and water” unless you’ve done the math, because it can land much stronger than you intended.
3) Apply from the bottom up with a gentle fan. Wet the mossy areas evenly; don’t blast it, and don’t scrub. You’re aiming for coverage, not impact.
4) Let dwell time do the work. The moss should darken or fade as it dies, then weather off over days to weeks with rain.
5) Rinse plants again and watch the downspouts. After application, re-soak nearby landscaping and keep runoff out of storm drains as best you can.
A roof-saving mindset shift is to treat moss as something you stop first, then let weather remove. If you need instant bare-shingle results, you’re more likely to reach for aggressive brushing or pressure, and that’s where granules disappear.
After It Dies: Removal Without Shingle Damage

Killing moss changes the physics: it stops actively rooting and holding moisture, but it won’t vanish the same day. In Wilmington’s rain and humidity, expect dead moss to darken first, then slowly shed over weeks as wind and rainfall work it loose. If you judge success by “bare shingles by tonight,” you will chase a quick fix. That is like sanding a table to remove dust.
To clear what’s safe to clear, focus on what collects off the roof: watch the gutters and downspout exits, then remove clumps by hand or with a gentle hose rinse. If dead residue still clings to shingles, don’t scrape or hard-brush it; that’s how you take granules with it and turn a moss fix into premature wear.
Stop Regrowth in Wilmington’s Climate
You trim the shade, speed up drying, and the roof stops turning green every time the weather turns wet. Done right, prevention means you spend minutes on upkeep instead of repeating a full treatment.
Around Wilmington, moss usually returns for one reason: you’re feeding it shade plus long drying times. Prioritize what changes the roof’s drying cycle first, like trimming back overhangs and clearing valleys and gutters so water sheds fast.
Then plan maintenance like it’s normal, not a failure, and sanity-check products the way you would with Consumer Reports for roof cleaning Wilmington NC. Ignoring upkeep is the easiest way to pay more later. In this humidity, a “one-and-done” treatment mindset sets you up to overcorrect with harsher methods later.
Some homeowners prefer plant-friendlier roof moss treatments that focus on controlled application and runoff management to reduce landscaping impact. Read more in our article: Greensoy Roof Treatment As an example, the north-facing plane under a tree line may need a light retreatment on a repeating schedule, especially after stormy seasons, even if you add prevention like zinc near the ridge.
Zinc/Copper Strips: What They Do (and Don’t)

In an EPA roof-runoff monitoring report, zinc roof runoff concentrations were reported around 5–30 mg/L during the first two years in that study context. That number is why it’s worth thinking about downspouts and discharge areas before you add metal strips in a rainy climate.
Zinc and copper strips are best as a prevention layer, not your main way to kill moss on a roof. They’re commonly described in manufacturer and industry guidance as inhibiting moss and mildew growth over time as rainwater washes trace metals down the shingle surface, so they won’t erase an existing green mat just because you installed them.
If you use them, treat them like a long-term helper and get the basics right: you typically need about 1 inch (often 1–2 inches) of metal exposed to work, and some manufacturer instructions warn against tucking more than about an inch under shingles. Also remember the tradeoff: what washes down also washes off like grit through a coffee filter into your gutters. You can’t avoid that tradeoff, since the same runoff that carries trace metals across the shingles also carries them into your gutters. In a rainy climate, that means more metal ends up in gutters and runoff, so keep an eye on where your downspouts discharge and avoid letting it dump straight into sensitive planting beds or drains.
FAQ
How Strong Is Household Bleach, and Why Does That Change DIY Dilution?
Most household bleach is about 5%–9% sodium hypochlorite, so a “50/50 bleach and water” mix can end up much stronger than you think if you don’t check the label first. Read the percentage on the jug and mix intentionally, not by habit.
Is Pressure Washing Ever a Good Idea for Killing Moss on Asphalt Shingles?
No, because pressure washing removes moss by force, and that same force can strip granules and drive water under shingles. If you want a roof that lasts, you should treat moss like a chemistry-and-time problem, not a blasting problem.
How Do I Reduce Runoff Risk if I’m Trying to Be Eco-Friendlier?
Assume whatever you apply will end up in your gutters and at your downspout exits, especially in Wilmington’s frequent rain. Pre-wet and re-wet nearby plants, keep runoff out of storm drains when you can, and pay attention to where your downspouts discharge before you treat.
When Should I Hire a Pro Instead of DIY?
Hire it out if the roof is steep or slick, or you can’t reach the problem areas from a stable ladder position, because fall risk outweighs any savings. Also call a soft-wash pro if you have heavy, thick growth that would tempt you to scrape or if you need controlled application to protect landscaping and drainage areas.
Contact us for a free inspection or call 703-673-6301 to find out where you stand.
If the moss keeps winning, our Wilmington roof cleaning service kills it at the root without blasting granules.