You’re not imagining it: asphalt shingles can look fine for years, then suddenly turn chalky, faded, and brittle-looking. Usually, that “overnight” change shows up once the asphalt binder has aged enough that it no longer holds granules tightly. It is like old sealant that has lost its grip, so normal sun and wind start showing up fast.
What matters next isn’t just how bad the field shingles look from the yard. You need to figure out where the change is concentrated, whether the roof is still shedding water, and whether vulnerable details are starting to fail first, especially in coastal North Carolina’s mix of UV and gusty storms. This guide shows how to read those patterns, check the roof without cracking brittle tabs, and choose between a targeted repair, a short-term rejuvenation, or a wind-smart replacement before minor wear turns into deck damage.
When “sudden” Is a Tipping Point

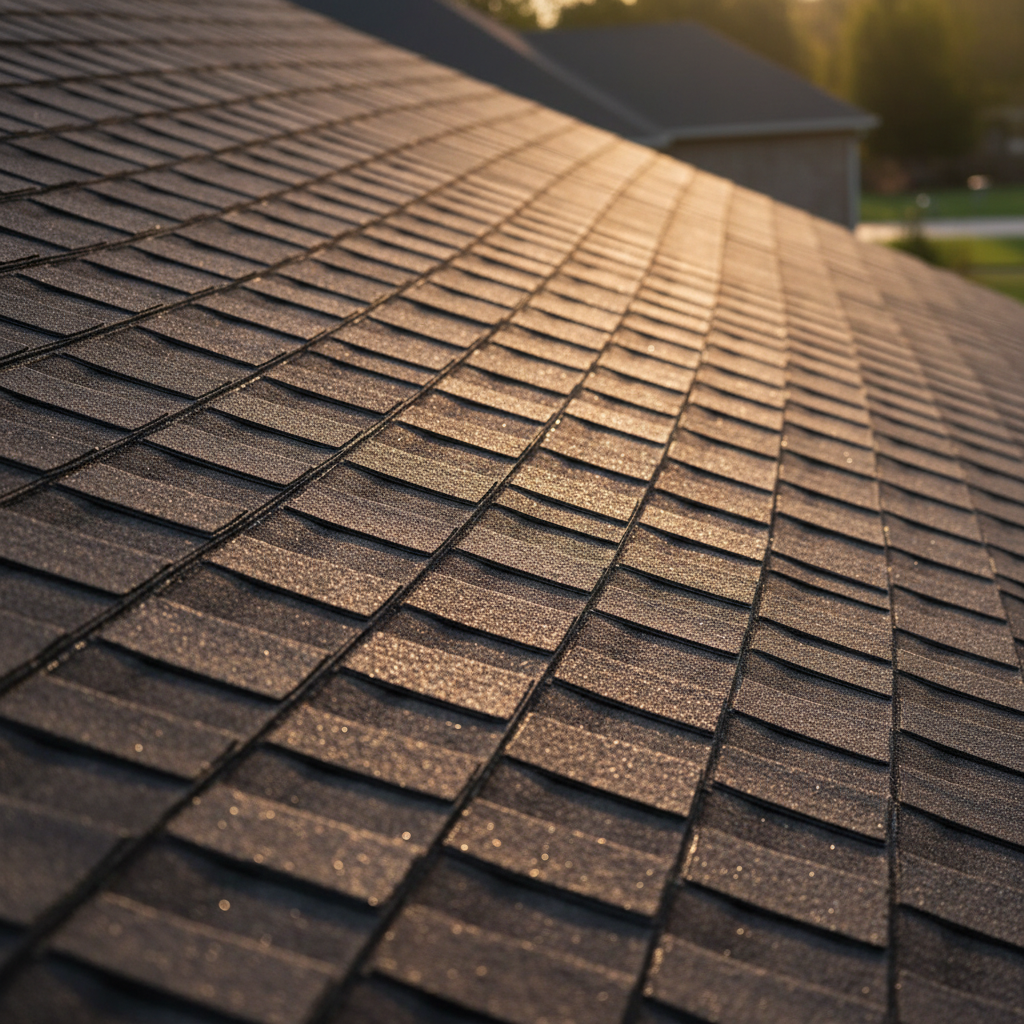
Most asphalt shingles don’t go from “fine” to “shot” overnight, even if it feels sudden. They age as heat and UV drive off the lighter oils in the asphalt and small micro-cracks build under the granules. After the binder stiffens past a threshold, the surface may shift fast, moving from dark and textured to chalky and brittle-looking. Granules stop staying embedded (shingles losing granules), and the mat below starts showing through.
For example, after a hot stretch on a south-facing slope in coastal North Carolina, that already-stressed shingle field can cross the line where granule loss accelerates. That can make the roof look “dry” all at once, even though the wear has been building for years. Thinking this is cosmetic is flat-out wrong, especially if you are also watching The Weather Channel or NOAA like the rest of coastal NC during storm season. It usually means you’ve entered a faster-wear phase, so it’s time to inspect vulnerable areas (edges and ridges) and document what you’re seeing before the next wind event.
Read the Pattern on Your Roof

A lot of homeowners do the right thing by “keeping an eye on it,” then get blindsided when the first leak shows up somewhere that never looked bad from the driveway. The giveaway is usually a pattern tied to roof granule loss causes, not an overall color shift.
If your shingles look dry and brittle “all of a sudden,” where it’s happening often matters more than how dramatic it looks. Because roofs almost never wear uniformly, assuming every slope is degrading at the same pace can speed up failure. You’ll miss the one area that’s about to turn into a leak, like a dock line that frays at one cleat before it snaps.
If it’s mainly on the south- or west-facing slope (the side that bakes in afternoon sun), that points to heat and UV driving the roof past a degradation threshold. As an example, two slopes can be the same age, but the sunny face loses granules faster and starts looking chalky first, especially after a hot stretch.
If the “dry” look clusters at rakes, eaves, hips, or the ridge, think wind and edge stress, not just age. Coastal gusts work those perimeters hard; once shingles stiffen, tabs and corners crack or tear more easily, and you’ll often see the worst brittleness where uplift forces concentrate (see FEMA guidance on improving asphalt shingle wind resistance in high-wind areas).
If you see it near vents, around bathroom fan terminations, or you notice it mostly above a hot attic zone, put ventilation on your shortlist.
Granule loss and surface chalkiness can be normal aging on one slope while still signaling damage or premature wear on another. Read more in our article: Normal Shingle Wear Vs Damage Poor attic ventilation shingles keeps the roof deck and shingles hotter for longer. It accelerates binder aging and makes that sudden shift more likely. Case in point: a house with one under-ventilated section can show “old roof” symptoms in a specific band while the rest looks merely worn.
If the brittleness-looking change shows up along valleys or around flashings, don’t get distracted by the field shingles. Those details fail first; your next move is to inspect for lifted edges, exposed nail heads, cracking sealant, and any place water can track sideways before it ever drips onto drywall.
Coastal NC Accelerators to Rule In/Out

You can make it through a season with no missing shingles and still lose a step on every hot, humid week and every salt-laced breeze. Then one ordinary coastal front can turn “a little weathered” into “why does this look so far gone?”
In the Wilmington-area coastal band, “dry and brittle” often shows up fast because your roof lives through bigger swings: intense sun that bakes the asphalt, followed by humidity and sudden downpours. That wet/dry cycling doesn’t just make shingles look faded. It is a penny-wise, pound-foolish move to ignore it in coastal NC, especially when your HOA or ARB will still expect the roof to look and perform right. It speeds up binder stiffening. It can turn tiny, invisible cracking under the granules into visible chalkiness after one hot stretch or one storm cleanup.
Salt and wind-driven grit add a second punch.
Salt-laced wind and humidity can speed up asphalt binder aging and make brittleness show up sooner than homeowners expect along the coast. Read more in our article: Salt Air Humidity Shingles Fine sand and airborne salt can act like mild abrasion over time, so the protective granule layer thins unevenly, especially near edges where wind speeds up. For instance, after a typical coastal blow, you might not see missing shingles, but you’ll notice corners that look scuffed or ridge-cap granules collecting in gutters.
Don’t default to “it’s just old.” In high-wind regions, once shingles stiffen, attachment and edge details start deciding outcomes. If brittleness-looking change clusters at rakes and ridge, treat it as a wind-risk signal and prioritize an inspection of perimeter sealing and fastener blow-through (wind damage shingles symptoms) before the next front rolls through.
15-minute inspection you can do safely

If you can confirm a few key clues without putting weight on a brittle roof, you get useful answers without accidentally creating the damage you are trying to prevent. A quick, careful check also gives you photos that make any roofer conversation faster and less salesy.
You don’t need to climb on the roof to get useful answers. In fact, once shingles get stiff, walking them can crack tabs and be the straw that broke the camel’s back. It is like stepping on a saltine and expecting it not to crumble. Your goal in 15 minutes is to capture a few clear signals and document them so you can compare after the next hot stretch or wind event.
Using phone zoom from the ground, photograph the ridge (missing or frayed caps) and the perimeters (hips, rakes, and eaves with wavy edges or lifted tabs). In your gutters or at downspouts, scoop a small handful of granules into a clear bag and photograph them next to a coin. Then snap a picture of bare spots on shingles if you can see them.
In the attic, with a flashlight, look for dark stains, fresh rings on the underside of the decking, and any daylight around penetrations.
A documented inspection helps you separate cosmetic aging from early leak signals before you spend money on repairs or replacement. Read more in our article: Typical Roof Inspection Photograph anything suspicious and note the location (for example: “above hall bath fan” or “rear left valley”) so a roofer can go straight to the right detail.
What to do next—repair, rejuvenate, or replace
In harsher coastal climates, roofs often don’t age on the “national average” timeline. Some coastal-market estimates put asphalt shingle life closer to 12–18 years instead of the commonly cited 20–25, so a roof that feels “not that old” can still be at decision time.
Treat “dry and brittle” as a performance risk, not a beauty issue. What you do next depends on whether you found active water entry, localized weak details, or widespread surface breakdown.
| What you found | Common signs mentioned in this guide | What it suggests | Next move |
|---|---|---|---|
| Active water entry | Attic staining; wet-looking nails; daylight at a penetration | A performance issue that can worsen with the next storm | Repair first (schedule a roofer to address the specific detail; bring photos) |
| Localized weak detail(s) | Damage concentrated at a valley / pipe boot / ridge edge; lifted edges; exposed nail heads; cracking sealant | Details may be failing before the field shingles | Repair the weak spot(s) before considering broader work |
| Widespread surface breakdown (no leak signals) | Broad chalkiness; steady granules in gutters; tabs still lie flat | Faster-wear phase, but not necessarily leaking yet | Explore rejuvenation/maintenance only after a pro confirms you’re not coating over failing flashings |
| Widespread breakdown + wind-risk signs | Brittleness and granule loss across multiple slopes; cracked/tear-prone edges; tabs easily liftable after a normal coastal breeze | Higher blow-off/tear risk in coastal wind | Plan for replacement and prioritize wind-rated installation details |
When you spot attic staining or daylight at a penetration, make repair the first step. Schedule a roofer to address that specific detail and bring your photos so they don’t upsell you into a full tear-off. If you have broad chalkiness with steady granules in gutters but no leak signals, you can explore rejuvenation/maintenance as a short-term life extension. Do it only after a pro confirms you’re not trying to “coat over” failing flashings. If multiple slopes show brittleness and granule loss, or tabs lift easily after a normal coastal breeze, plan for replacement and focus on wind-rated installation details. Relying on “it isn’t leaking yet” is wishful thinking, and Angi or Google Reviews are still the fastest way to find a contractor (roof inspection near me Wilmington NC) who will install it to a wind-rated standard.
Roof not getting any younger? Contact us at Contact us or call 910-241-1152 to find out where you stand.